Showing posts with label frame. Show all posts

Friday, December 30, 2016

Updates and Upgrades on my Goshawk touring bike

So, I've made some changes to my custom, handbuilt-by-me Goshawk touring bike over the last year or so, and I thought I'd share them here.

It all started when a mishap happened involving a roof rack.  No, no, don't worry, I didn't drive into a garage with the bike on the roof or anything catastrophic like that.  The bike was in one of those roof racks where you remove the front wheel and clamp the fork to the rack at the dropouts.  A sharp turn, luckily at low speed in a parking lot, and the bike ended up on its side on the roof.  Not sure exactly why the clamp didn't hold, but it ended up bending one of the dropouts pretty badly.  Being a steel frame, I was able to straighten it out, but the powder coat suffered in the process, so I figured I'd get the fork re-coated.

Rack mounts and cable guides brazed and cleaned up
While I was at it, I decided to take the opportunity to make a few additions to the fork.  When I built the frame at United Bicycle Institute, I ran out of time to do all the various brazed on bits and pieces I had hoped to include.  With the clarity of hindsight, I now realize I could have added them during the window of time after I brought it home and before I got it powder coated in the first place, but oh well.  Really, the major item I didn't get to add in the initial build was a set of mounts for a "low rider" style front rack for panniers, and since Tubus makes a clamp on adapter, I figured it wasn't the end of the world.  That being said, it wasn't particularly attractive.  Sturdy yes, pretty no.  So while I had the fork off the bike for repair and re-coating, I added a set of mounts for a rack, and while I was at it, a few guides for running wires up the inner face of the right fork leg for a dynamo lighting system.

Once I got the fork back from the powder coat shop, I started thinking about other changes I wanted to make.  For one thing, I never really fell in love with the handlebars I had chosen.  I had read over the years that a lot of touring and long distance cyclists like the randonneur style drop bar that has a bit of a sweep upwards from the stem to the top of the drops.  I really tried, but just never liked them all that much.  Over the years I've become rather fond of fairly wide (44 - 46cm) drop bars with a nice long flat stretch on either side of the stem, so that's what I installed this time.  The bars I seem to keep coming back to are made by the Japanese company Nitto, their model B115, a classic "Maes" style bend.


Nitto B115 bars, Shimano and Tektro brake levers
The other part of the "cockpit" (a term I don't really like for bicycles, but at the moment I can't think of a better shorthand) I wasn't thrilled with was the brake levers.  Again, based on others' recommendations and preferences, I tried out a set of levers from Tektro.  Some folks really like the bigger, chunkier hoods, and I can certainly understand that, but after years of using more traditional, skinnier levers, I didn't love them.  Honestly, if it weren't for the fact that I was already changing the handlebars, and had a different set of levers in my parts stash, I would have left them alone.  They didn't bother me, I just didn't love them.  The other change I made was purely aesthetic, in changing the "cross" brake levers with a set of all silver ones in place of the silver and black.

Shimano CX50 brakes
One final, unplanned component change came about as I was re-assembling the bike.  For some reason I can't fathom, when I built the frame, I positioned the mounts for the cantilever brakes too close together for most modern brakes.  I must have read the guide book wrong or something, I don't know.  When I first assembled the bike, I tried a few different options, but none of the modern brakes I had available to me at the time worked, so I went with a set of really nice old Shimano XT brakes from the late 80s or early 90s.  They worked fine, but were frankly kind of a pain to get adjusted just right, and when I went to re-install them in this build, it just frustrated me to the point I decided to try something else.  So after some research, I decided to try a set of Shimano CX50 cantilevers that come with three different spacers for the brake pads, to adjust to different mount spacing.  They worked out really well, and were very straightforward to set up.  Shimano gives very thorough instructions for setting them up with the various spacers, and they seem to stop just fine.  I don't have a lot of miles on them yet, but I think they're going to be fine.

V-O bag support
While I had it all apart, I also decided to make some changes in the luggage racks.  Specifically, I wanted to change from black racks to silver, and the best combination of features I wanted seemed to be in Tubus brand racks from Germany, so you'll see their Cosmo on the rear and Nova low-rider on the front.  Sturdy and stable, they work really well with all kinds of panniers, especially the Ortlieb brand that I typically use.  Completing the package is a handlebar bag support from Velo Orange. An interesting feature of this one is the integrated "decauler", which makes it easy to attach and remove the handlebar bag, yet doesn't leave an ugly piece of hardware on the bike when the bag isn't there.  The top part of the rack comes with an inverted "U" shaped piece that fits onto the open ends and makes it look like a normal rack.

Here she is, with bar bag
And without bar bag

As a final touch, I replaced the Mirrycle Duet bell with a more stylish (and louder) Crane lever-strike style bell.  It looks great, and has a terrific sound and amazing sustain.  A minor thing, but fun.

Shiny and loud!

Now all I need is the time and the weather to take her out on a tour, or at least a good overnight trip on the C&O Canal.  I designed the bike to take wide tires under those fenders, and now she's wearing Schwalbe Marathon Supreme tires in a 700x42mm size, so she makes a great towpath camping bike.

Plans for the future?  Well, I mentioned early on that I had added guides for dynamo hub wires up the fork, so obviously at some point I want to install such a system on the bike. I've got dynohubs on a number of bikes, and it sure would be handy on a touring bike.  And one day I might just get some decals made for the frame.  Stay tuned!

And if you want to see more pictures of the bike, from raw tubing through several variations in components, check it out here:  Goshawk - My First Frame

Monday, March 1, 2010

North American Handmade Bike Show 2010

This year the NAHBS was held in Richmond, VA, so it was easy for me to get to. Ironically, I actually spent more time at the show when it was in Portland, OR, in 2008. I guess it's just easier to make a real outing of it when it's so far away... one's more inclined to take time a chunk of time off for a distant event, perhaps. And of course, 2008 was my first time, so I immersed myself a bit more.


That's not to say 2010 wasn't good... just that my time was measured in hours rather than days. I still enjoyed the show and saw some amazing, wonderful bikes. And I got to visit the folks from Brompton, who sent Katharine from their UK offices, as well as their US agent, Ed Rae. I spent a fair chunk of time at their booth today, and it seemed they got a good amount of attention and interest. I think people were suprised to see a folding bike there, even more so one made in England. But the Brompton is essentially a handmade bike, so it fits in better than one might think.

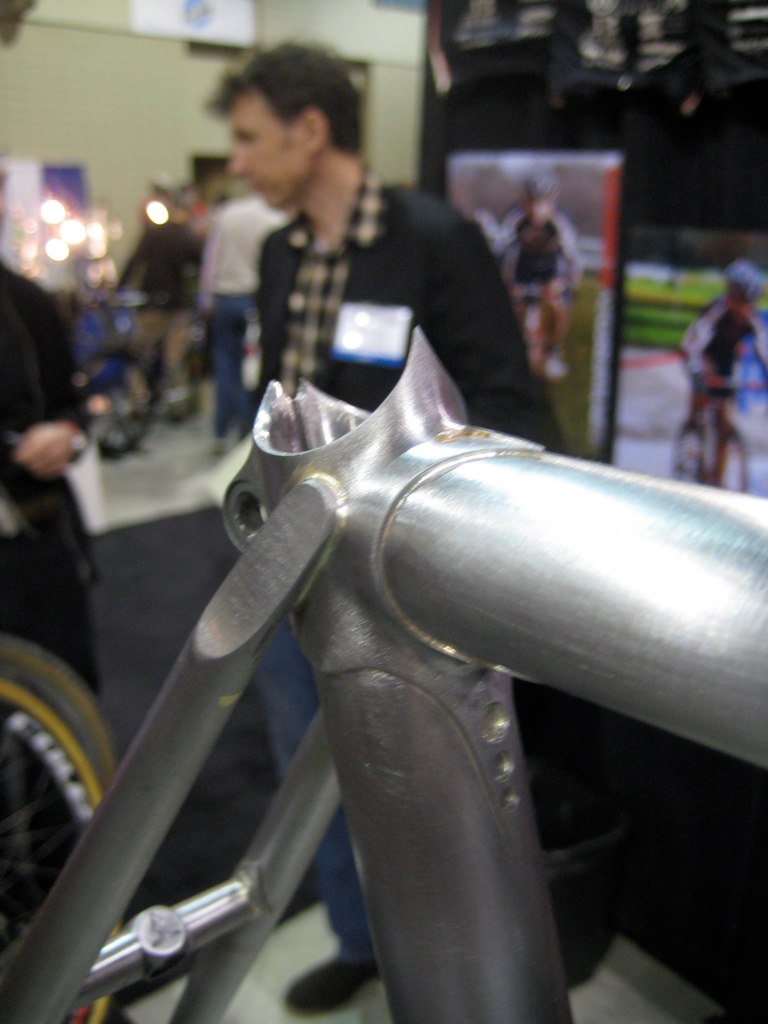
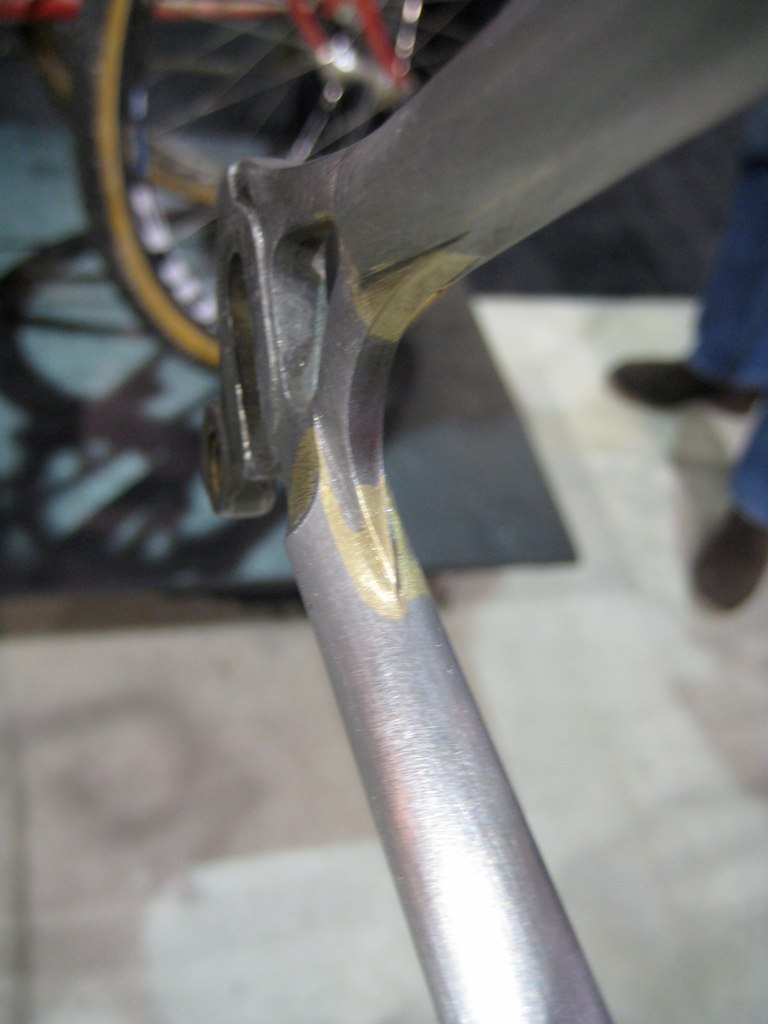
After visiting with those folks, I then went on a lap around the show, checking out the various builders' work and also checking out some of the tools and materials of the trade. As in 2008, I found the show inspiring, and I hope it helps get some more momentum behind my efforts to get my own framebuilding moving forward. It always helps to see other peoples' work, to see the kinds of things that folks get excited about as well.

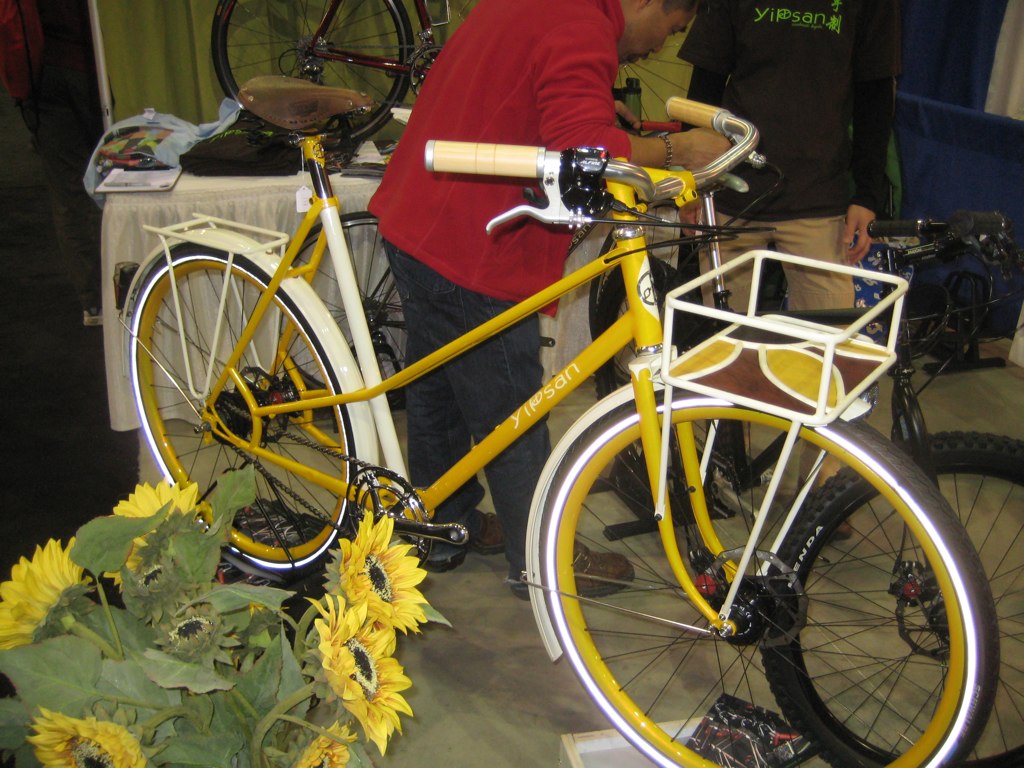
For me, bikes built from a more "transportation" perspective appeal to me. To my mind that encompasses commuting and errand bikes, as well as touring and randonneuring cycles. And luckily for me, that range of bikes was well represented at the show. It's lovely to see the various special touches builders are incorporating into bikes designed to get you and some stuff somewhere. Custom racks, classy bags and bag hardware, fenders, lighting systems, all integrated into the design of the bike... it makes for an elegant, practical, and artful bicycle. One of the nicest bikes I saw was this "mixte" from Yipsan, complete with custom rack with some lovely woodwork incorporated into it. The customer apparently has a thing for sunflowers, and that was an inspiration for the overall design for the bike. It's not merely a beautiful bike, however... aside from the rack and lighting system, the bike also has an internally geared Shimano Alfine hub and disc brakes, which makes for a solid, reliable and worry free bike.


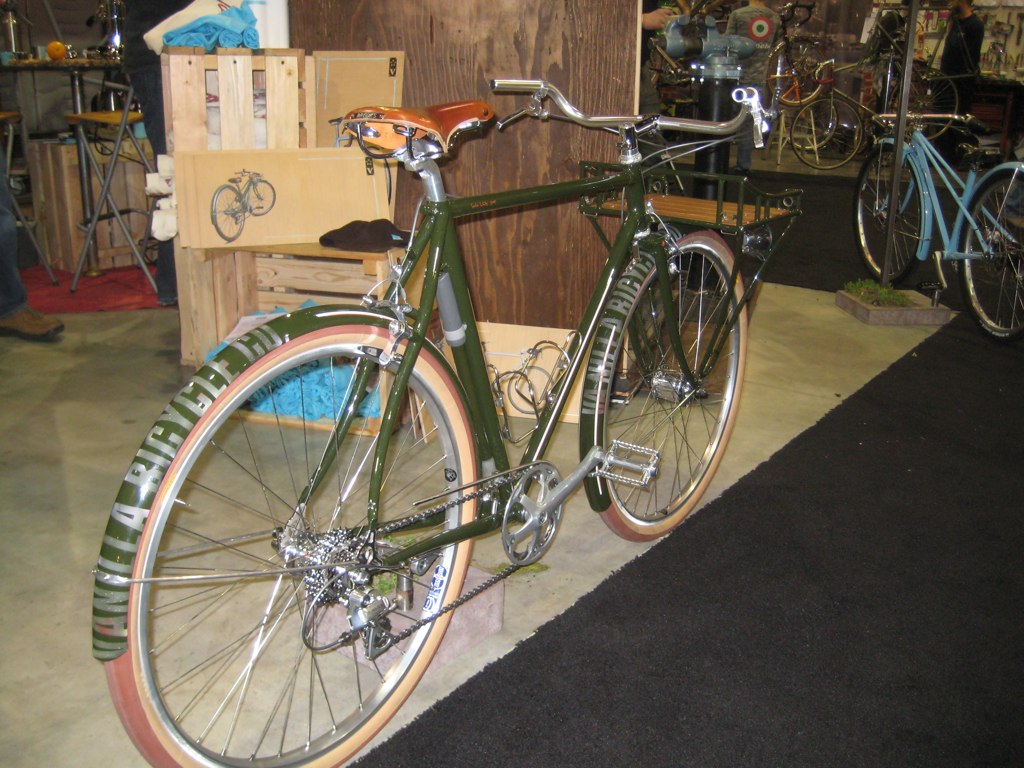
Sacha White, aka "Vanilla Bicycles" of Portlan, OR, was also there, and par for the course, showed some impeccable work. Below is one of his interpretations of a "practical" bike. Gorgeous machine, and eminently useful.


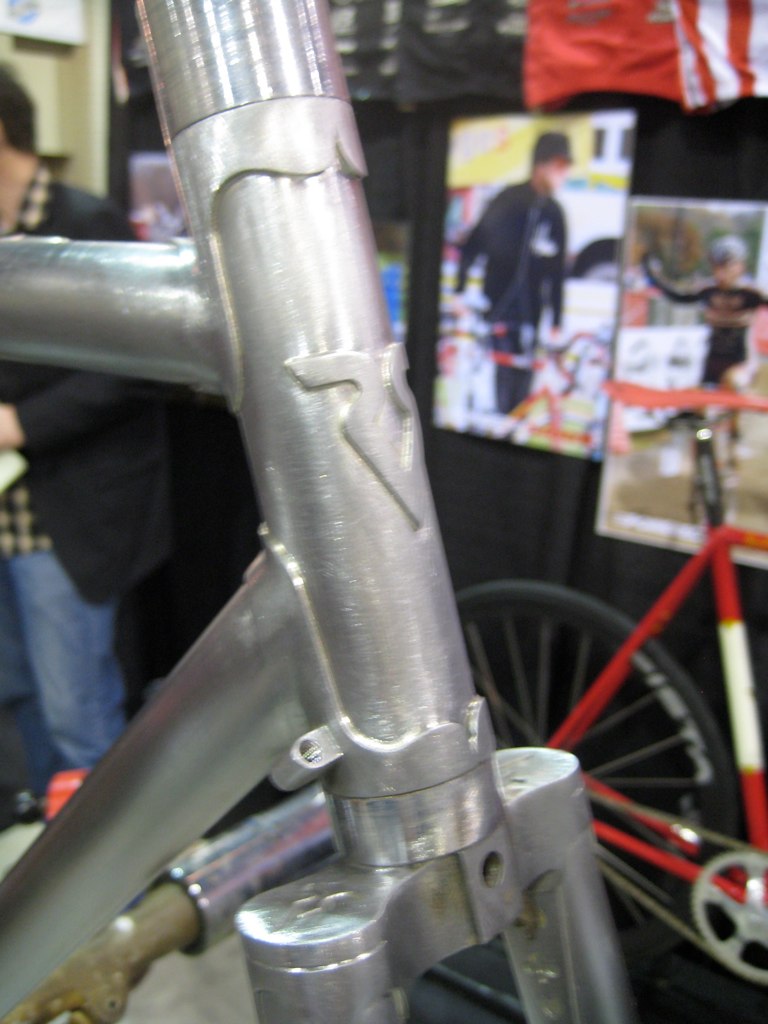
In a different vein, Richard Sachs was there, showing his impeccable work, slanted mostly toward the racing set:


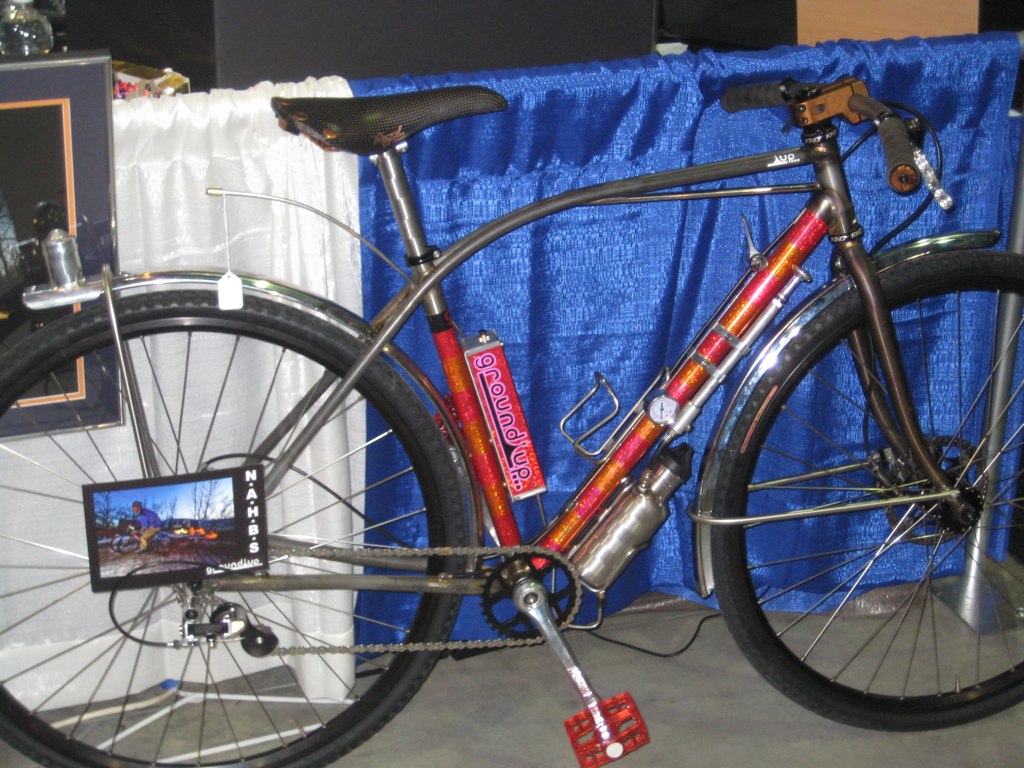
Then, in the realm of the whimsical and weird, there was this bike from Ground Up that incorporated a rearward facing "flamethrower"... a system incorporating some sort of fuel compressed in a tank, with a nozzle facing aft over a small burner cup, similar to a tiki torch, which ignites the vaporized fuel! Photos of the system in action are quite amazing!


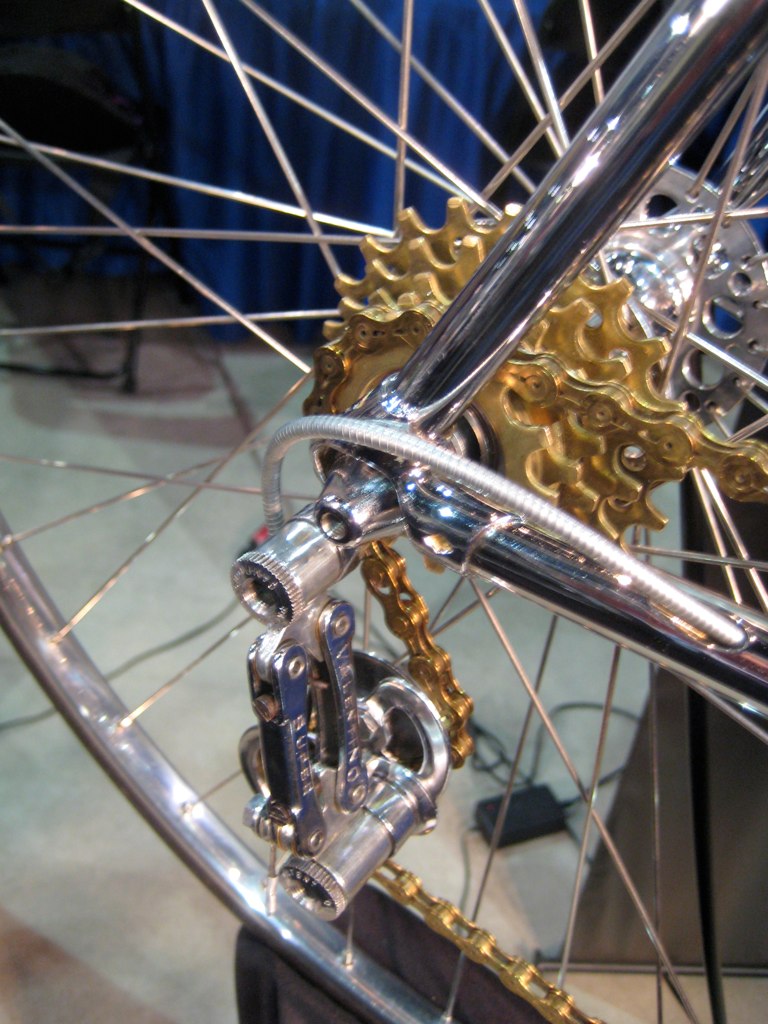
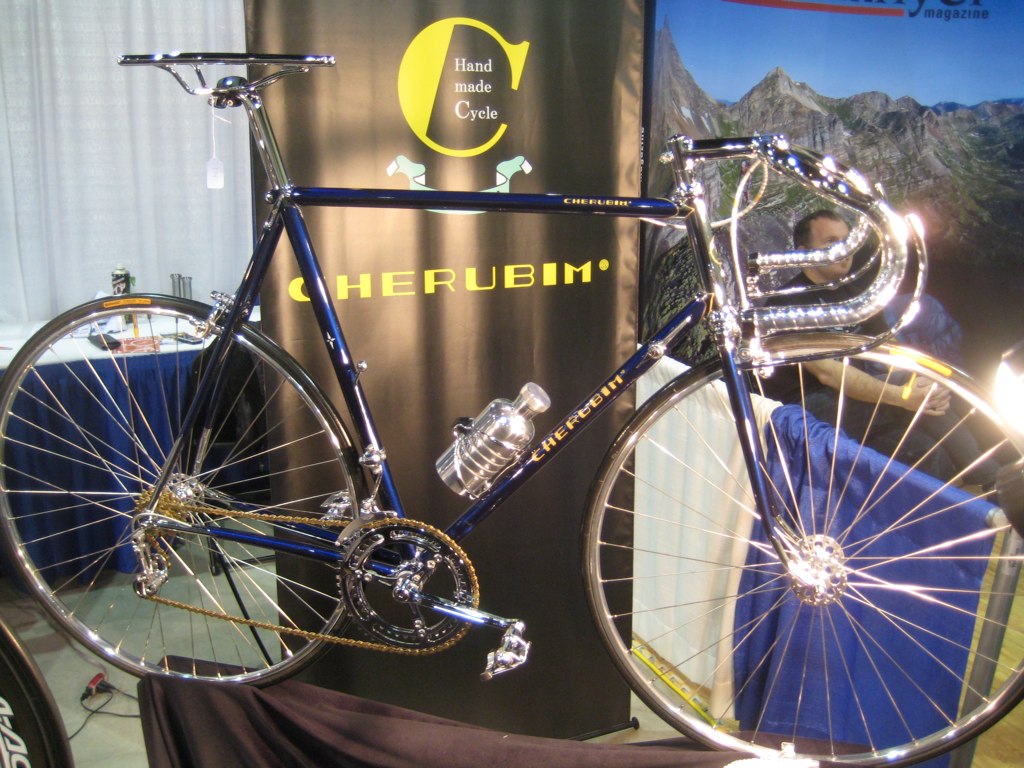
And finally, I'd be remiss if I didn't include at least one photo of this amazingly shiny, sparkly bit of bicycle "eye candy" from Cherubim... an amazingly finished and polished machine utilizing some older classic parts, highly plated and polished. Gorgeous!


More photos can be seen at: NAHBS February 28, 2010

Also, Google NAHBS 2010 to find other folks' pictures... I'm sure there are lots that are better than mine. I'm still getting the hang of shooting these bike shows.

Sunday, April 26, 2009

A Study in Contrasts... and a ride!

So today, like most days recently, I rode to work on my newly built "Tim-built" bike... actually, here and now I should just come out and announce that if I can get things together to produce more frames and bikes, I plan to do it under the name of "Goshawk Cycles". I've always had a fascination with raptors, and the Goshawk is fast and agile, something I think is good in bicycles!


Anyway, after work, with plenty of daylight left, I thought I'd go for at least a short ride. And for a change of pace, I thought I'd ride my Fuji Track Bike. As I was getting ready for the ride, I couldn't resist snapping a photo of them both in the rack outside the shop. The bikes are just so different, I thought it an interesting tableau.


The Fuji, on the left, is about as pared down as a bike can get. Okay, the track bike purists would leave off the front brake, but I like having it there for safety's sake. Otherwise it's a straight, fixed gear drive train... no shifting, no coasting, just a seemingly direct connection between feet and wheel. No extraneous parts, no frills, just a bare, light, fast bike.


The Goshawk, on the other hand, is about self-supported travel in a wide range of conditions... pavement and dirt, fair weather and foul. So we've got fat tires, full coverage fenders, racks, and a saddlebag, as well as the ability to carry more bags for overnight trips. The kind of bike you can load up with tent, sleeping bag, stove, food, etc., and head out on a long, long adventure.


Both are great fun to ride, and it's fun to have such variety in my little squadron of bikes. And for this evening's short ride, the Fuji was just the ticket. The fixed gear forces one to keep pedaling at all times, and also requires more of you on climbs. In addition, you use some different muscles in riding fixed, as part of the time you are using your leg muscles to slow the bike. A lot of fun, a bit of a challenge, and a great change of pace.


It was a lovely evening too. The deer were out in force, and the frogs were singing. Alas, gnats have also begun to make themselves known, and I was swatting them off my arms from time to time. But it was worth it to enjoy the sights, sounds, and smells of a warm spring evening. The lowering sun on the trees, especially the dogwoods, was particularly pretty, as you can see here.


After the ride, I noticed one other spring phenomenon... see the closeup of the Fuji frame here? See the light dusting of green? Yep, you guessed it... pollen! I was out on the bike less than an hour, and enough pollen had settled on it that it was clearly visible against the red paint, and on the black tires! Amazing. It makes me grateful that I don't suffer from allergies... and sympathetic to those who do.


Finally, I headed home, once again on the Goshawk... and while it's not as light and swift as the Fuji, it's a wonderful ride. Stable and sturdy, without feeling stodgy. I have to admit, I'm very pleased, and rather proud that a bike I made has turned out so well. Here's to many more!

Friday, March 27, 2009

First Frame Update Again!

Well, here she is, with the tan leather bar tape from Velo Orange. It's not really the same color as the saddle, as you can see... it's closer to the color of the straps on the saddlebag. I'm hoping some neat's foot oil, as Velo Orange recommends treating it, will darken it a bit. It's still a nice look... the leather saddle, leather straps on bag, leather bar tape, leather mud flap on the fender... they all harmonize, even if they don't match perfectly.

Also new are the tires. I designed the bike to accept tires up to 42mm wide, with the fenders, and I wanted to get a set of tires that size, both to prove the point and for use on rough surfaces like the C&O Canal here in DC, or even the footpath I ride part of the way to work. So I took off the original Panaracer Paselas that were labeled 700Cx35, and put on a set of Schwalbe Marathon Supremes, labeled 700Cx40, with an ERTRO size of 42-622.

Okay, to make that somewhat decipherable...the "700Cx40" designation is the generic "size" designation of the tire. 700C is the most common nominal diameter of "road" tire.. the second number, after the x is the width... theoretically. In the ERTRO (I can't for the life of me remember what that stands for now) standards, the first number before the dash is the width, the second is the diameter of the tire at the bead, where it hooks on the rim, which is 622mm for road tires. But wait, you say... the Schwalbes say they are 40mm wide in the "size" designation and 42mm wide in the ERTRO! Yeah, well welcome to the fun of bicycle tire sizing, where nothing is even remotely clear or consistent. GENERALLY, it's been my experience that the width listed under the ERTRO system is more accurate. Guess what? In the case of these tires, it's NOT! Turns out they measure a tad shy of 40mm wide, more like 38 or 39, actually. Argh. The whole point was to put the widest tires I could fit, and these really aren't more than 2 or 3 mm wider than the Panaracers. Ah well... they're supposed to be really good tires for touring, and are probably a bit more rugged than the Panaracers... and besides, I've paid for them already. The only real bummer is that the tan sidewalls of the Panaracers were nicer looking with the various brown bits on the bike. I can live with the black sidewalls for now. I just wish these were really 42mm wide.

Anyway, at this point the only thing I don't have on the bike is a front "low rider" rack for panniers. Until I'm ready to head out on a multi-day camping trip, I can hold off on that, but eventually I'll be putting a Tubus Tara rack on there. Those bike-savvy readers with sharp eyes will notice that the fork lacks brazed on upper attachment points for that rack... yeah, I know. I ran out of time in building the frame. It's ok, because the folks at Tubus have what looks like a really good mounting bracket to attach to the fork. Not as slick as a braze-on, but it will work fine.

So there she is, basically done! I'm very pleased with how the bike has turned out.. it looks sharp, but more importantly rides really nicely! Stable and smooth and comfortable, but by no means sluggish. Sure, I wouldn't use it for road racing, but it's nimble enough unloaded for my purposes. Sometime this spring I'll load it up with camping gear and head out for at least an overnight. I'll write then how it handles a load. Stay tuned!

Friday, March 20, 2009

New Stem For First Frame

Well, just a short update tonight... I decided to put a silver stem on the bike in place of the black one. It's a Nitto Technomic, the same stem I have on a lot of my bikes. I think it looks better, don't you?

Oh, on a minor note, there's a new pump there too, along the top tube. I decided the silver Road Master Blaster from Topeak was a better choice than the black Zefal hpx. The Zefal works great, but is kinda ugly on this bike.


Next is the Velo-Orange elk hide bar wrap, in a brown that's close to the saddle color. After that, the only things I have left to address are a front rack and eventually some bigger tires for off road touring. I am planning to try Schwalbe
Marathon Supremes in a 700x40 size for the tires, and a Tubus Tara for the front rack. Beyond that, I MIGHT add a handlebar bag, but I might not. I'm not that big a fan of them, honestly, but for touring they can come in handy. The trick is to get one that's functional, stable, and attractive... not that easy to find, from what I've seen.

I really like how it's riding now with the new bars and shifters and brake levers. I made the right choice to ditch the trekking bars.

Sunday, March 15, 2009

New Bars on First Frame

Well, I gave the "trekking" or "butterfly" bars a few rides to see how I liked them, and they just didn't work for me on this bike. The main reason is that it just felt like I was sitting too upright, and my hands felt too close in for comfort on long rides. As I thought about it, it made sense... I had designed the bike around the dimensions of my 1986 Miyata 1000, which has a short top tube by today's standards. That worked fine for me with the Miyata with drop handlebars. I'm long of leg and short of torso, so older road bikes with shorter top tubes fit me well... but the trekking bars have a much shorter effective "reach" than drops. If you look at them, you'll see the closest "in" position places your hands quite a bit closer than the top part of a drop bar, and the furthest "out" position really doesn't get you much farther than the "ramp" behind the brake levers on a drop bar. I've put up photos of both bar setups for comparison below.


The new bars are a Nitto B135 Randonneur bar, a drop bar designed for touring. You can see from the photos that the bar has a gentle sweep upward from the stem, and the drop portions flare out as well. It's fairly similar to the old Nitto Dirt Drop bars that I have on my Bridgestone XO-2, and lots of folks like the Randonneur bars for touring, so I thought I'd give them a try. So far, I like them! Very comfortable, and a graceful look to them that seems to suit this bike. And the position is MUCH better for me... I feel like I'm reaching just the right distance in all positions, and the bike's handling feels better as well, with more of my weight forward now.

I've also decided to try a different brake lever for a change. In modern road brake levers, I've generally stuck with the Shimano "aero" style levers, and I like them a lot. Beautifully made and a very comfortable shape, I'm very happy with them on my other bikes. But I had been wanting to try one of the other levers out there, and settled on the Tektro R200A levers. The lever body is wider and chunkier than the Shimano levers, and some people have a strong preference for one over the other. Maybe I'm not picky enough, but I find after several rides I'm just fine with either. One feature the Tektro levers have that the Shimano lack is a quick release built into the lever. For this bike it's not really a big deal, since cantilever brakes can be easily released for wheel removal, but I can see where it might be handy on other bikes.

In the "tried and true" realm, you'll see I've also installed "interruptor" or "cross" levers on the tops of the handlebars as well. This gives a second braking position, similar to that created by the old "safety" levers, but in this case, they actuall WORK, unlike the old style, which gave feeble braking at best.

Finally, you'll notice that I've once again gone with the Shimano bar end shift levers, in place of the Deore XT thumbshifters I used on the trekking bars. Thumbies don't fit road bars, and I really wasn't that fond of them anyway.

One last change I am contemplating before wrapping the handlebars... the black Salsa stem, while a very nice stem, looks kind of out of place on this bike, and I'm leaning toward a more traditional silver Nitto stem. The only downside to that is that they don't have the two bolt open face design that allows easy bar swaps. On the other hand, if I make sure I like the Randonneur bars before I wrap them, I really shouldn't have to worry about the open face stem any time soon. What do you folks think? Is it worth it to swap out for a silver stem, or should I just leave well enough alone? Hmmmmmm... anyone...anyone?


Sunday, March 8, 2009

More info on First Frame

Well, in case any of you are out there wondering just what bits and pieces I used to put together a bike designed and built by me for me, here goes!

The frameset itself is built from cro-moly steel tubing provided by United Bicycle Institute, and I believe most of it is Deddaciai brand from Italy. The main tubes are "oversize" outer diameters, which for steel road bikes means the seat and top tubes are 28.6mm and the downtube is 31.8mm. The wall thickness of the main tubes is .9mm at the ends and .6mm in the middle. The variable wall thickness is what is known as "double butted" tubing, and a special process in manufacture gives you extra thickness at the joints, and thinner walls in the less-stressed middles of the tubes. The lugs (the sleeves that help connect the tubes) are from Henry James, a maker of frame components and framebuilding tools. They also make the remarkable jigs that we used at UBI to set up and braze the main triangle of the frame. The bottom bracket shell is from Pacenti Cycle design, and the fork crown is an Everest cyclocross model. All of these components were easy to work with, although the bottom bracket shell needed a fair amount of tweaking to accomodate the large tire clearance and curved chainstays I chose. That's not a fault of the shell... it's just a reflection of the challenges inherent in what I was trying to achieve.


Now, once it came time to turn this all into a whole bike, I picked out a combination of components that I have used before and found reliable and suited to the uses I planned for the bike. As I've said before, one of the ideas behind this bike was to create a solid, stable, comfortable bike for loaded touring on and off road. By "off road" I simply mean dirt roads and moderate dirt paths, along the line of canal towpaths and such, not serious singletrack better suited to a true mountain bike.

With this in mind, I started with the idea that I wanted some very solid, reliable wheels. I've really grown to appreciate the Velocity Dyad rim from Australia as a touring rim. I first saw them on a visit to Co-Motion Cycles in Oregon, a maker of tandem and touring bikes, and I was quite impressed at the time. I have since had the opportunity to build a number of wheels with them, and very much like the results. It's a solid, strong rim, that builds up nice and straight and round without a lot of effort. And it seems to result in a very reliable wheel. The hubs on both wheels are Shimano XT mountain bike hubs, which I like for their excellent seals. There are certainly more expensive hubs out there, but I'm not convinced I'd have gained that much, if anything, by opting for something else. The spokes are tried and true DT Competition double butted spokes, 2.0mm/1.8mm/2.omm, stainless steel with brass nipples. Not exotic, but strong and reliable. The cassette on the rear is an eight cog, 12-32 tooth cassette from Nashbar... I don't really need an 11 tooth cog, and there aren't a lot of other options out there. It's a good combination with the Sugino XD600 crankset, which has 26/36/46 tooth chain rings. I've used the same tooth counts on my Miyata 1000, and it seems pretty much ideal for loaded touring for me. The pedals are the new Shimano M530, a really nice design that features an SPD fitting on one side and a very comfortable flat platform on the other, so I can use either special cycling shoes (or sandals, for me) or any old shoes I have on.

The derailleurs are Shimano LX series. The rear is pretty much a current model, but the front is a couple of generations back. At the moment, the shifters are Shimano Rapidfire thumb shifters, but when I swap the handlebars out, I will go to Shimano bar end shifters instead. One disappointment with the shifters is that they don't have a "trim" function to prevent chain rub on the front derailleur, but other than that, they work just fine. The bars on the other hand, aren't really working for me. I designed the bike based on my Miyata, and how it fits me, but it has drop handlebars, and a short top tube. This bike, with the same short top tube, but with bars that sweep further back and don't sweep as far forward as drops, feels too "upright" in position. So it's drop bars next. I'm not sure if I'll just use my tried and true Nitto 115 bars, a pretty classic "Maes bend", or if I'll branch out and try something else. Lots of folks seem to love the slightly upswept "randonneur" bars, but when I tried them briefly years ago, they felt a little odd. Chances are I'll start with the 115s, since I have a set handy.

The brakes are older Shimano XT II cantilever brakes, which work really well, and look pretty to boot. I managed to buy a set of new old stock brakes a couple of years ago, and that was what I had in mind when I built the frame. Unfortunately, after building the frame, I changed my mind and bought a set of modern Shimano cantilevers... but spacing on the brake bosses is different with modern brakes, so they didn't really work. That's ok, the XTs are really great, and I'm sure I'll find a use for the newer brakes another time.


Finally, the accessories! I toyed with several options for fenders, but settled on the Zeppelin style from Velo Orange, a small importer of classically styled bicycle parts in Annapolis, MD. I wrote about a visit to their showroom with a friend a while back. Very cool stuff, and a very neat company. And the fenders are great! A very pretty shape, and a very useful profile and sturdy construction, while still lightweight. They were a little trickier to install than my usual SKS plastic fenders, but worth it. And the retail cost on the two is very nearly the same.

The rack is a Tubus Cargo, a very nice tubular cro-moly steel rack from Germany. I've not owned one before, but have seen and installed some on bikes at our shop, and they're really excellent racks. My only regret is that the silver version isn't imported to the US. Ah well. For future tours, I plan to install a "low-rider" style rack from Tubus, the Tara. I didn't get the chance to braze on the mid-fork mounts for that rack, but they make a very nice adapter clamp that will work just fine. With that combination I should be able to carry anything I could possibly need in front and rear panniers and on top of the rear rack if need be. For day to day use, I have the Carradice Nelson Longflap saddlebag. Plenty big enough for the stuff I carry to and from work or on day rides, and there's even room for a few groceries, if need be. That's where the "Longflap" comes in... the top flap on the bag actually has an extended panel that folds back on itself for normal use, but unfolds to give you a bit more capacity if you need it. It's kind of like the expansion feature of a nice piece of luggage, and very handy.

In the smaller accesories, I fell back on what I've used and liked before, with one exception. The tail light is the same Planet Bike Blinky 7 I have on most of my other bikes... it's bright, easy to mount, and has a very wide field of view. Plus, the company contributes lots of money to bicycle advocacy programs. On top of all this, it's a very affordable light for all of it's qualities, at about $18 retail. For the headlight, I opted to try something new... that's a Cateye EL530 on there, a single LED with a very well designed reflector that casts a very bright beam of light at the center, with a good amount of "spill" around the main beam so you can see things at the periphery and motorists can see you from the sides. So far, I'm really impressed with it. I'm not as fond of Cateye's mounting hardware as I am of Planet Bike's, but currently this light is the brightest I've seen of the self-contained battery powered lights. For warning fellow path users, I have an Incredibell Brass Duet, which lets out a very nice double-ding tone, which seems to get folks' attention without startling them too badly. And to track my mileage and such, I've just installed a Sigma BC1106 computer. I'm not really Mr. Cyclecomputer, but I do like to know how far I've gone on a ride. I record the information on a spreadsheet pretty consistently, but never really do anything beyond enter it. It's not a "training tool" or anything... just a curiousity I guess.

So what's left? At the moment I need to figure out the handlebar situation, which will also mean new brake levers and shifters, as I noted above. I have a set of wider tires on order as well. The current tires are a favorite of mine, the Panaracer Pasela 700x35, but since I designed the bike to take wider tires, I will be getting a pair of Schwalbe's Marathon Supremes in 700x40mm, which should be great for rougher surfaces like the C&O Canal. Other than that, the bike's basically done, and now it's all about riding it and enjoying it!

Friday, March 6, 2009

First Frame Update

Well, our "last gasp of winter" (maybe) snowstorm this past weekend, put a crimp in my riding plans, but the weather made an abrupt turnaround and we had sun and 60s today! Since our shop is still in "winter hours", I have a longish break in the afternoon, so I got out for about an hour's ride on the new bike.

You can see it here, as currently set up. It's still a work in progress, which doesn't really surprise me. Since my last post, I got the fenders and rack and saddlebag on, which makes it look really "complete" to me. I built the bike to be practical.. for touring, for commuting, for shopping, for all weather and many surface conditions. So the fenders are an essential element, as is the rack. The saddlebag, a Carradice Nelson Longflap from England, is what I carry my small daily commute load in, and its' also suitable for a quick trip to the grocery store if I need one or two items. The rack will support panniers for touring or heavier shopping loads.

At the moment, the only things "missing" from what I had originally planned for the bike are a front rack for panniers (for touring) and a cyclecomputer. Oh, and since the bike was designed to handle 42mm wide tires with fenders, I've ordered a set of Schwalbe Marathon Supreme tires in that size. I've heard good things about them, and they're one of the few high quality tires made in that size.

Now, one thing that seems clear after the first few rides is that the "trekking" style bars just don't feel right on this bike. I've used them before on an old mountain bike that I used as a commuter and general knocking around bike, but they just feel awkward on this bike. Basically, they feel too upright and too wide for the uses I imagine for this bike. Some of that is because I'm most accustomed to "drop" style handlebars, so that's what feels most natural. But I think part of it is also due to the relatively short top tube of the frame. I designed it based on my old Miyata 1000, which has a short top tube compared to most modern bikes, but it fits me just fine... with drop handlebars. I could try a different stem with more reach, but I also don't really like the width of these bars, particularly in a headwind... it just feels like I really catch the wind with these bars. So once I get a new set of road brake levers, I'll put on a set of Nitto drop bars I have already.

It's not a big deal... I had actually had in mind the idea that I might swap the bars around based on how I was using the bike at a particular time. For example, if I knew I were going to do a long off-road tour, I might opt for the trekking bars, but switch back to drops for normal road use. However, I have a feeling I'm just going to settle into drop bars on this bike and be happy with them.

Keep watching this space for updates! As I said, it's a work in progress. And for you serious bike geeks out there, soon I'll spell out exactly what parts I built the bike up with.

More pictures at http://www.flickr.com/photos/43828356@N00/sets/72157614034677336/

Saturday, February 21, 2009

First Frame - Finally!

Here it is folks... the first bicycle frame I've built from scratch! It's been a long journey, but it's been one of great learning and exploration, and in the end I have a bike I'm proud of and will get a lot of joy out of riding. That's it to the left there, a complete, whole bicycle, save for some accessories I'm still in the process of adding (fenders, racks, lights, etc.).

The story begins, oh, back when I was in my teens, in the 1970s. Back then, I lived in suburban Maryland, not far from Proteus Design, a bike shop that also housed a framebuilding operation. I used to go over there and drool over the hand built frames, and the gorgeous components they'd hang on them, and dream of one day owning one. (Parenthetically, I finally did get one, about a year ago... more on that another day) Then I learned that they offered a class in framebuilding, in which you'd build your own custom frame under their guidance. It was just a dream then, one I couldn't afford, but I finally managed to take a course from United Bicycle Institute, in Ashland, OR, in Novemeber of 2005.

The class was amazing... Ron Sutphin, who runs the school and teaches many of the framebuilding classes, is an excellent teacher, and the other folks he had in to help teach were also very good. And the class was a fun bunch of people... there were 8 students total, and I was the old guy in the group, in my 40s... most of my classmates appeared to be in their 20s or maybe early 30s. A pretty varied set of backgrounds and interests... some others from bike shops, others not. And the bikes we all chose to build varied quite a bit as well. My choice was to build a touring bike capable of handling some mild off-pavement journeys loaded with camping gear.

As a starting point, I took the dimensions of my 1986 Miyata 1000 touring frame, and then made a few modifications. The two primary changes I made were designing in clearance for larger tires (700x42mm with fenders), and using larger diameter tubing with thinner walls. The first was to make the bike better suited to the off-road riding, and the tubing choice was largely an experiment, to see if I could make a lighter frame that would be as stiff as the Miyata.

One of the first things we did in class was take measurements of each other (it's hard to measure yourself) and begin a full size drawing of our frame. Throughout the rest of the two week process, we kept going back to that drawing, in many cases working right on the drawing to lay out and mark the pieces for cutting, as shown here to the right. The overall structure of the class was for the instructor to demonstrate a step in the process, after which we were given a chunk of time to do it ourselves with our projects. I have to say, they really have it down to an art with the organization of the class... while at any given moment each of us might be at a slightly different point in the process, nobody ever got totally behind or ahead of themselves, and we all learned a lot, and had fun doing it.

At the end of the two weeks, we each had all the basic brazing and assembly of our frames finished. We learned the procedures for checking alignment on a surface plate, as well as using more basic tools, and the final frame "prep" was also covered - facing and reaming the head tube so both faces are parallel and the correct inside diameter; facing and chasing the threads for the bottom bracket; and reaming out the seat tube to accept a seat post. What remained for us to do once we returned home was "clean up" work... basically filing any imperfections and smoothing out some of the joints in the frame (particularly where the dropouts meet the stays or fork blades, which you will understand better if you look at my Flickr album). After that, we could take it to a painter or powder coater and then build it up into a bike.

And therein I hit my snags. Long story, not worth going into, but after a good start on this part of the process, I hit a pretty major motivational slump, and aside from a few sporadic stabs at making more progress, the project lay idle for a long, long time. So I had a partly filed frame gathering dust, and as time went on, that in itself made getting up the gumption to move forward difficult.

This past autumn, however, as I've noted, things improved, and I began to get some neglected projects completed (see my flurry of Bridgestones in October/November). And this helped me to get the energy to put the frame back into the workstand and pull out my files... and after a couple of weeks of working around my work schedule, and I was ready to take it to be powdercoated. Thanks to a combination of Crag's List and a friend of mine, I found a shop that does a lot of bicycle work, and seemed to "get" what a bicycle frame requires, so I took it to them. Two weeks later, I had the frame back in my hands, and began building it up into a bike. And there at the top of this post, you see it, in all it's glory. As of today, it also has a rear rack (a Tubus Cargo in black) and a green Carradice Nelson Longflap saddlebag. Soon to come is a set of fenders... silver aluminum ones from a company called Velo Orange, in Annapolis, MD... a style they call the "Zeppelin", because the cross-section is faceted, much like the cross section of an old dirigible. I think they'll look really sharp.

I've posted some photos of the process and the bike, from start to today, on my Flickr account:

http://www.flickr.com/photos/43828356@N00/sets/72157614034677336/

And watch this space for future developments. If all goes well, this will only be the first of many.